Sunday, May 1, 2011

Batik Frame and Paper Flowers

After making the hobo quilt for my table covering for the craft fair, I had plenty of material scraps leftover. I used the material to cover one of the leftover frames. After covering, the frame was nice, but somewhat bland.

The frame sat for a few days until I ran across a tutorial for paper flowers. This tutorial showed these awesome curled/distressed flowers that looked silk, but were really paper. Turns out is was an advertisement from some paper company for use of their products. They made the whole thing seem like it couldn't be achieved without their products.

It started with simple cardstock that they used a die to cut into the shape they wanted. The tutorial said you had to wrinkle and roll the paper. The author said that it was quick and easy. My approach was using a flower shaped stamp and cutting the shape with scissors. The paper I used (not theirs) took some coercing to get the desired effect. Either the author was lying or their paper just comes apart easily.

When it was all said and done, I got the look I was hoping for and it turned into a beautiful frame. Each flower was finished with dark rose colored pearls. I haven't decided if I am listing this frame or keeping it as inspiration for other fabric covered frames like this.

Monday, April 11, 2011

Post First Fair

So after much confusion and cancellation, BK and I ventured down to the ACC Craft Fair in Gilbert, Az. Much as I expected, No sales! But that is okay! We had a good time and that was enough for me, especially after the craziness prior to the show.

Friday morning we got an email saying that the show was canceled due to the crazy storm coming in*. Three hours later, they decided it was better to just have the show. As planned, we left Flagstaff on Friday afternoon and got to the hotel about 7pm. When we arrived, I realized we forgot one of the boxes. We ran to Michaels to get some last minute things.

Before we had left, BK made sure to cover everything with a tarp. When we got the hotel, I pulled the one box we did remember out of the truck* and tied everything back down under the tarp. Overnight, it poured down rain, but we weren't worried because the the tarp covering. In the morning, BK went down and checked everything. Someone was in the bed of the truck sometime that night, as indicated by the fact that the tarp had been removed and the muddy foot prints on the top of the table I brought.

*sidenote: we drove the truck because of the snow that was expected in Flagstaff on Friday night

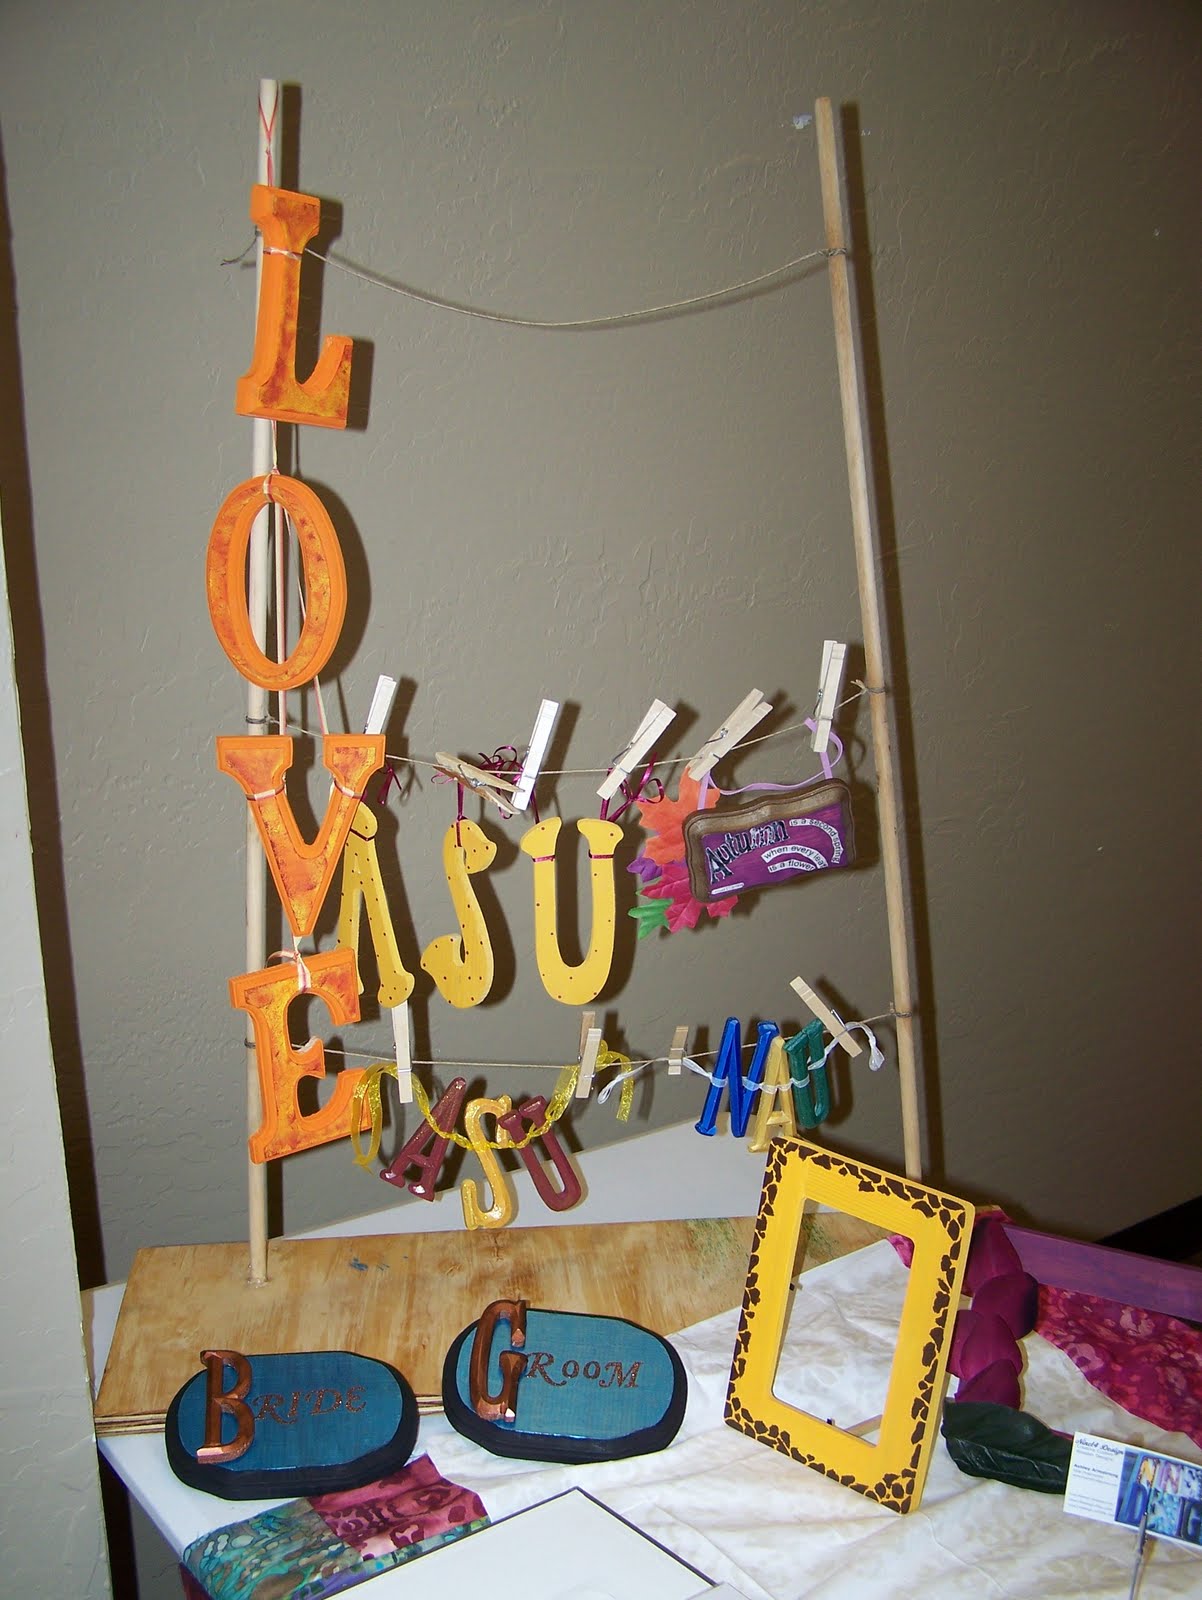
Despite everything, we made it to the craft fair and set everything up. My table looked plain and boring. But many people said my stuff was cute and looking good. I got the experience and I had a good idea about things to do better for next time.

When I set everything up, I only had about 13 items that I could sell. I also had a photo album of some of the items I had made and sold or given as gifts. As a result, for now I am in create mode. I definitely need a lot more things to display and show for everyone to good grasp of what I have to offer. On the upside, everything that has been created for the show will be uploaded to the etsy and artfire shops.

I need to make more letter sets and hanging signs. The frames are nice but not what I want to always sell, unless I can find some better antique frames that come with the glass inside of them. To go along with the new stuff, I am thinking I am gonna need another display to hold my hanging items.

Also, I need to fix my table covering as it is still not wide enough to cover the table. Two more strips of squares should do the trick. I will also need to hem all of the edges to make them cleaner. The last thing on my agenda for the next show we do, is to make plaques as if i were making them for sale, but to list the prices for the majority of my items. I think it will make things easier.

Thursday, March 31, 2011

ACC Arts and Crafts Fair

Earlier this week I registered for my first craft show promoting my own products! The show is April 9th in Gilbert, Arizona (see right). As of right now, I am waiting on confirmation on my registration. In preparation of this event, I have been working my behind off. An assortment of frames, wall hangings and a quilt have all been dreamed up and finished since about Sunday. I am not gonna post all of these items yet. I need to have some product to bring out to the fair.

I am also branching out with some other ideas that I haven't thought of yet. This includes small things that we are test running for the wedding. Now that I come to think of it, I haven't announced the big news on this blog! Berkeley and I got engaged on Christmas 2010! The wedding will be November 10, 2012 and we are planning a lot of DIY projects. Since it isn't directly affiliated with the Nine14 Design company I have been mainly talking about it on the YGFASINGS blog. If you are interested in our wedding planning and DIY projects I have a filter set up for just those items. Just go to the main page and click Wedding.

Back to the craft show, BK and I will be at 1458 N. Higley Rd on the corner of Baseline in Gilbert from about 8am to 4 or 5 in the evening. If you are in the area, come on down and say hi! As an extra incentive mention the blog or our Facebook page and you can get 15% off of any item or order!

Thursday, March 24, 2011

Revamp and New Products

Nine14 Design is undergoing a little revamp/reconstruction. Instead of just the personalized wooden goodies that we have been offering, more ready to ship and upcycled items. I have been experimenting with wooden craft frames and frames purchased at the local vintage/thrift shops. I have developed a few ideas and looks that I want to expand on and incorporate into the Nine14 Design product.

Most recently, I have been playing with flowers and metallic paints. Call it a spring bug, or just a desire to move past the drab grays and whites of the winter season here in Flagstaff. I am so excited for the brighter and happier stuff coming out. First is a frame that was "antiqued" with a staining medium and a reddish purple hue of acrylic paint. Then I attached petals cut from silk flowers. To break up the red, I added the leaf at the point where the petals came together.

Secondly, I used another craft frame and painted it with Folk Art brand metallic blue topaz. It was missing something. I found a wooden Love decoration from another craft. I liked the way the pink contrasted with the blue. I freehanded a few dots on front and attached it to the frame. As soon as I figure out a price point, I am gonna be adding these frames to the Etsy and Artfire shops soon.

Also, to try to reach more people and generate some sales, a Nine14 Design fan page was made on Facebook. Photos of all of the Nine14 Design products will be added to that page. Also, for all of our loyal followers and fans, our discounts (Use FBFANS15 for 15% off) and promotions will be available to you gals/guys first. Also, if you see something you like let me know, and I can reserve the listing specifically for you. So keep an eye out for new and exciting things coming up. And I promise to try to keep things updated regularly!

Wednesday, January 5, 2011

The Elly Collection

Right before Ms. Elly was born I started two projects specifically for her. I finally got caught up with all of my shipping and was able to send these items out to her. That means I can post the photos of them.

The first of three is a bag tag I have been toying with since the start of the Nine14 Design venture. It is simply a way to personalize any childs lunch bag, diaper bag, tote, luggage or purse. It was really simple. I added a ribbon and snaps to a pre-made wooden monkey. For Elly's I put her initials on the tummy. On the backside it says "I belong to..."

I haven't decided if I am gonna take this further, but I do have more monkeys, some giraffes and other jungle/safari animals. I also maybe figuring out other ideas for these little wooden guys.

The other thing I made was an announcement of Elly's birth. Instead of going the big wooden block for hanging, I chose a frame. It was lighter and added a small challenge of arranging the dots, and lettering perfectly. I personally think it turned out great!

First I took a wooden frame and sanded it down a little. Next came the round stickers for the polka dots. Then the layers of white paint. I chose the white base to break up all the pink of the letters I made her. Just like with the letters, I alternated the remaining colors, pink, mint and brown, around the edges of the frame. I made sure to have a multiple of three for the number of dots so that there were no dots of the exact same color right next to each other. At Michaels, I found some adhesive letters to use for her name and birthdate. The letters had a small amount of glitter and a shade of brown that stood out from the brown of the acrylic paints.

Heather loved them (I think) and I hope Elly likes them as she gets older. To end this post I will share some photos of the cutie!

Elly with the letters I made for her nursery back in October.

Ms Emmeline in her Bumbo wearing the shirt auntie Ashley bought her. I love this little girl more than words can describe!

Flickr!

All my pictures of products created by and for Nine14 Design have been and will continue to be upoaded to Flickr.com in the following albums Nine14 Design general album and The Elly Collection album.

Check it out periodically to see new photos of new items!